
Expanding Disk space for Virtual Machine in Hyper-V
In the last blog we have seen creating VHD (Virtual Hard Disk) in Hyper-V.
Today let’s see how to increase or extend the Disk Space.
Disk size getting full.
Cause is due to Increase in log file growth either it could be with Database or IIS logs.
So let’s see how to Extend the Disk Space in Hyper-v for VHD.
Steps:
Start -> Run -> virtmgmt.msc -> Enter
(Or)
Open Hyper-v
Start -> Administrative Tools -> Hyper-V Manager -> Click OK
Log in as an administrator and provide the Login Credentials.
Click Edit Disk on the right side of the screen as shown below:
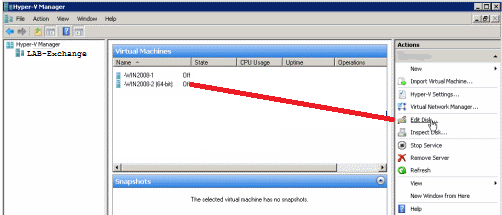
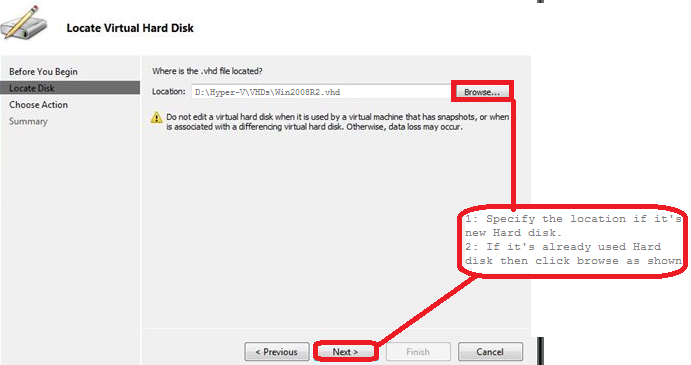
Click Edit Disk -> In the Welcome Screen -> click Next and then click on the file path of the virtual HD that you want to increase and then click Next again.

Note: The virtual machine that is using the HD cannot be Turned on and cannot be in Saved status. Is also not advisable for this procedure is done on machines with snapshots. They will not be available after completion.
Click Next
On the Choose Action screen, choose Expand, and then click Next as shown below.

To explain the other two options, it is interesting to understand the two types of discs: Dynamical and Fixed. The Convert option converts a dynamic vhd on a fixed disk. In the case of machines that need a lot of I/O disk…
The Compact option decreases the size of the vhd file when a large number of data are excluded from the dynamic HD.
The Dynamic disk vhd file is a small file (2 MB) which increases with the amount of data as it is added to the vhd, interesting in testing environments or when there is not much disk space on the physical machine.
The Fixed disk create a file with the same size that had been configured on the VHD Wizard.
You will get the option to increase the size of the virtual disk as shown below:
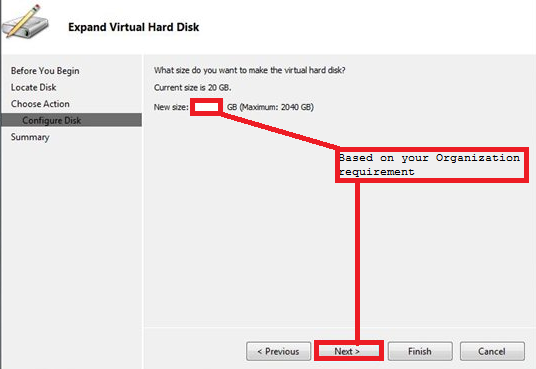
Choose the new size of the virtual disk and click Next. Based on your Organization Requirement Extending the disk space.
New size of the virtual disk
Confirm the options selected and click Finish.
Wait till the above operation completes, which should be quite fast. After that you can now connect the virtual machine.
Note: This is not the end of it. The disk drive on your VM internally is still only configured for the older space availability
Next, after booting the VM, use Disk Management snap-in from the Computer Management tool, or by using the DISKPART command to expand the partition within Windows. While possible in Windows Server 2008 and Windows Vista, unfortunately, in Windows 2000/XP/2003, you cannot use the built-in tools to expand the System Partition.
Summary:
Making space available in brief
1: Open Hyper-V Manager on physical machine
2: Stop the target VM
3: Right-click target VM and select settings
4: Hardware > IDE Controller > Hard drive
5: Edit Virtual Hard Disk
6: Choose Action > Expand
7: Enter expansion size
This is not the end of it. The disk drive on your VM internally is still only configured for the older space availability
Using the Available space
1: Log into the VM where you have increased the disk space.
2: Open Server Manager
3: Storage > Disk Management
4: Right-click Disk > Extend Volume
5: Enter expansion size from available size
Praveen Kumar
MCTS | Exchange Server
Publisher @ Techrid.com
