
Today before we begin promoting the Windows Server 2012 r2 as Domain Controller, let have a glance on Windows Server 2012 r2 installation on brief.
The steps are same either it could be with Hyper-v or Physical Machine.
Let’s discuss this in Hyper-v (cost Cutting) 🙂
Insert the disk in Media it will take you to welcome screen.

Now we begin with Mounting the Boot disk (win 2008 server sp1) in Hyper-V.
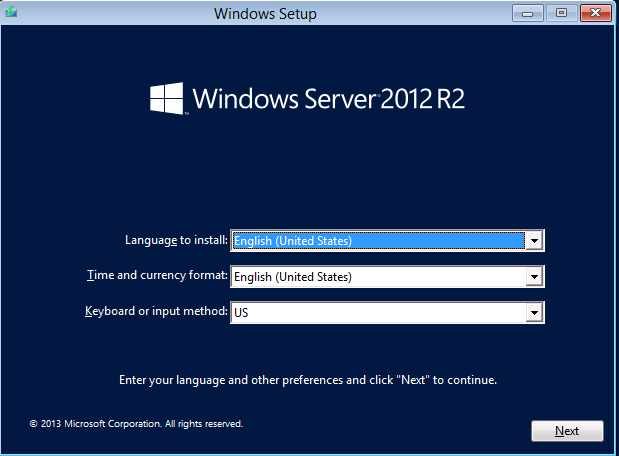
Let’s begin the installation, before you begin select the Language, Time Format and click Next.
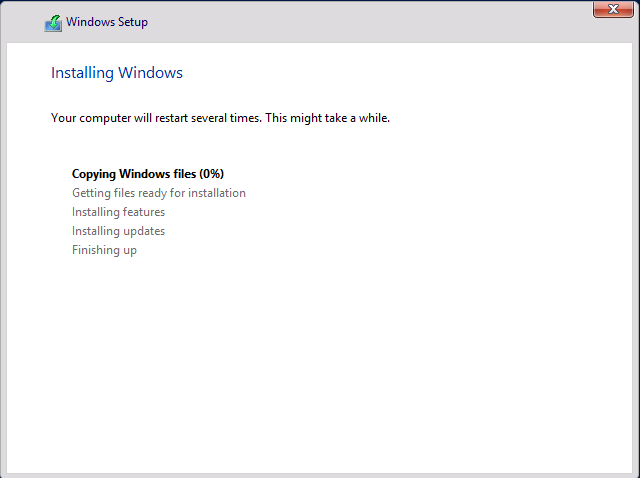
Click Next and Proceed further, Installation now begins.
Click Install.

You could have felt it strange when it prompts for Product key, yes in earlier versions this option we get after installation. So make sure you be ready with Product key.

Here we see only 2 types Core or Gui mode, please select based on your requirement. This depends on the product you give.
Flavors we get in get in Windows Server 2012 are:
| Windows Server 2012 Core |
| Windows Server 2012 Core N |
| Windows Server 2012 Core Single Language |
| Windows Server 2012 Core Country Specific |
| Windows Server 2012 Server Standard |
| Windows Server 2012 Standard Core |
| Windows Server 2012 MultiPoint Standard |
| Windows Server 2012 MultiPoint Premium |
| Windows Server 2012 Datacenter |
| Windows Server 2012 Datacenter Core |
In my scenario I have taken Standard.

Time for License to accept, click Next and proceed further.

Now it comes to Installation type if you are upgrading select upgrade or Custom Installation select Custom and Proceed further.

Perform the Disk Partition based on you requirement. After partition select the drive where you want to install and proceed further.
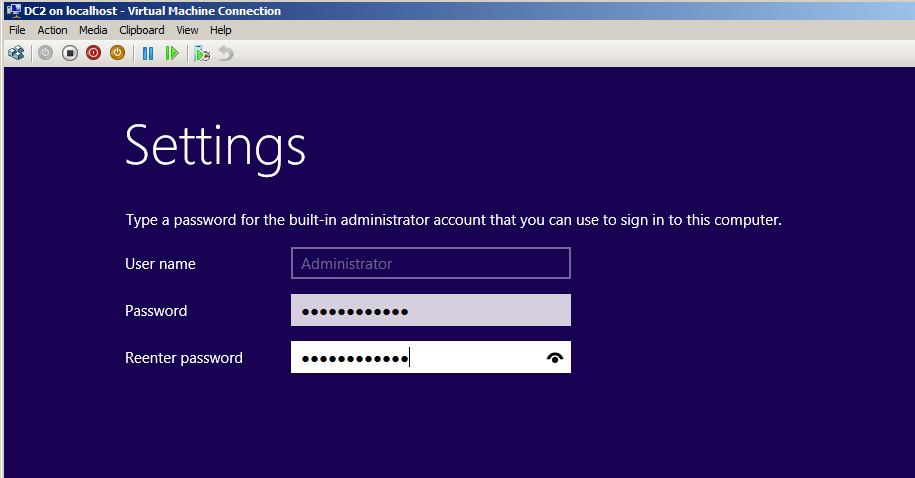
Now it’s time for Privacy, please provide the password and proceed.
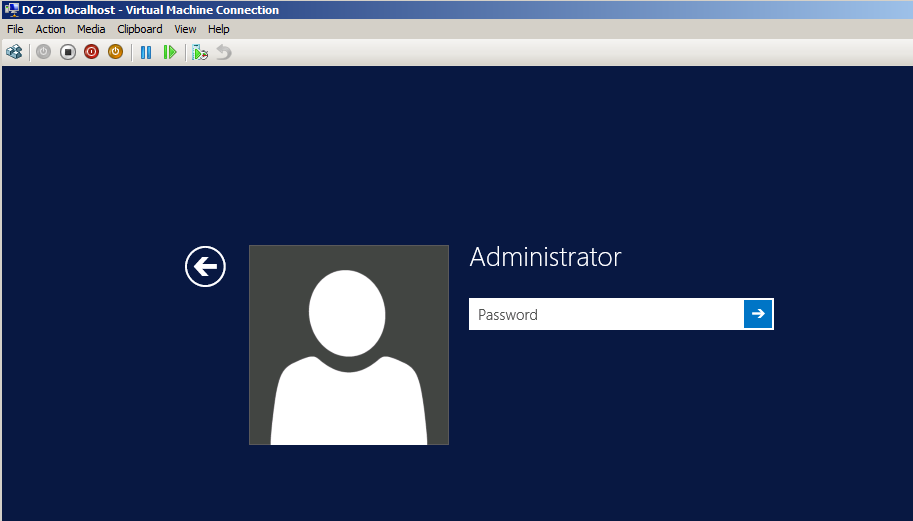
Now login to the machine.
Great Installation was successful and we are in the home page.

By this we can confirm that Installation completed Successful.
Note: Make sure your Based Machine and VHD do not have time sync issues.
Troubleshooting Time Sync Issues
Promoting Windows Server 2012 r2 to Domain Controller
Let’s begin promoting the machine to Domain Controller, we’ll proceed step by step.
First we’ll assign the IP address to the machine and computer name based on your requirement.
Logged into Server Manager.
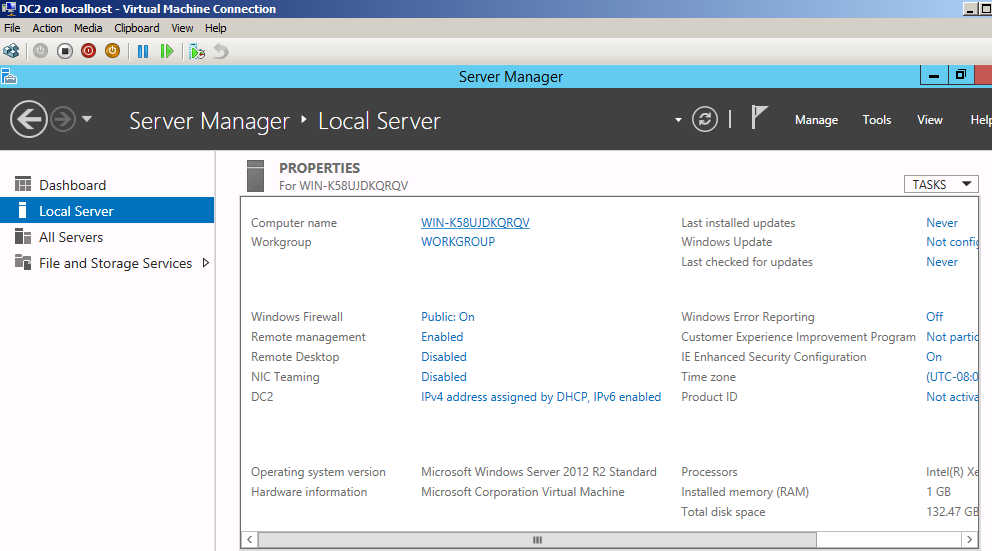
Changing the IP address.

Assigning IP address.

Time for changing the computer name based on your requirement, here you need to restart your machine.
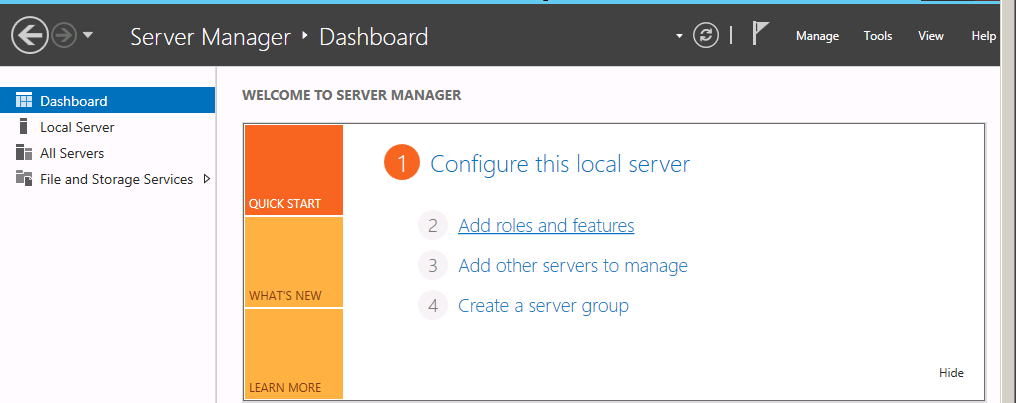
Now login to Server Manager and click on Dashboard on the left side on the pane.
In the middle of the page you can see “Add Roles and Features” this step is to enable the feature that we require.
Great here it will explain as why we have changed performed the tasks like Assigning IP Address and changing computer name. Because it will not let you proceed further 🙂

Click Next.
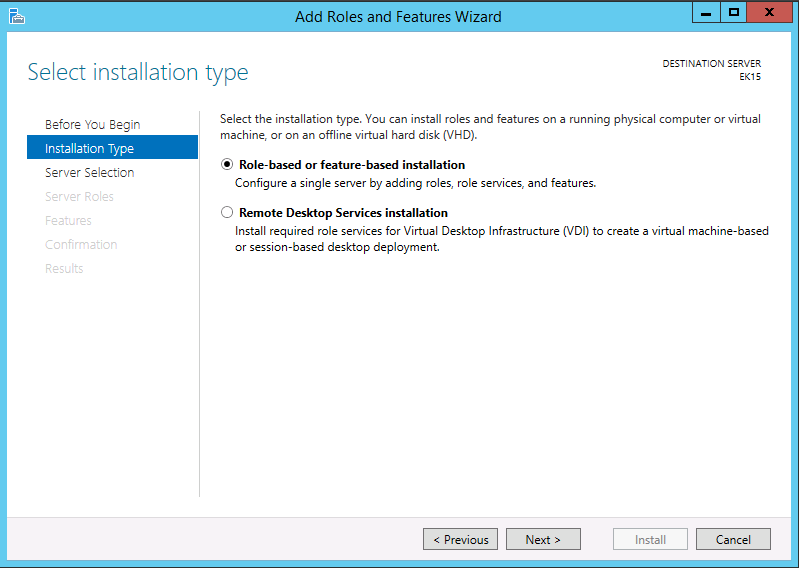
Select the option 1 “Role-based or feature-based Installation” and click Next.
Select the Destination Server and proceed further as shown below:

Select the Server Role you are assigning as shown below:

Click Next

Now it’s time for selecting Features as it’s play key role.
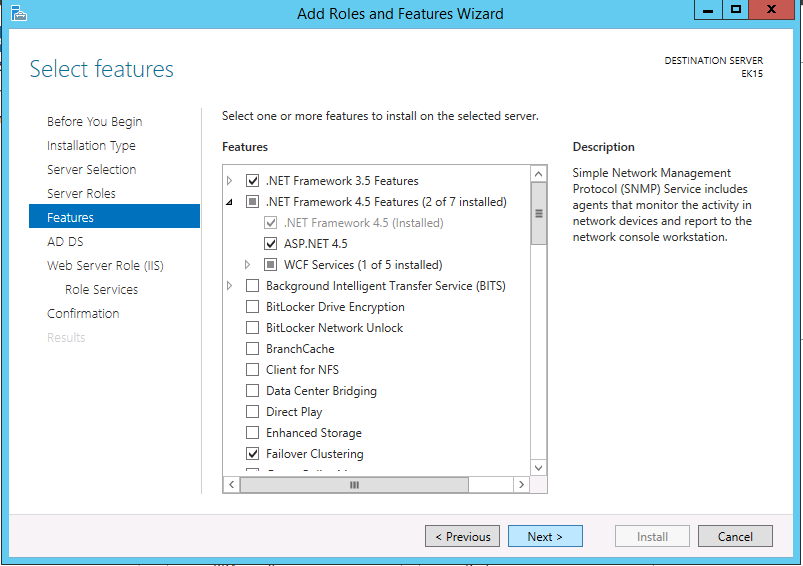
Click Next.
Features are that we adding AD DS

Click Next, installation might take some time.
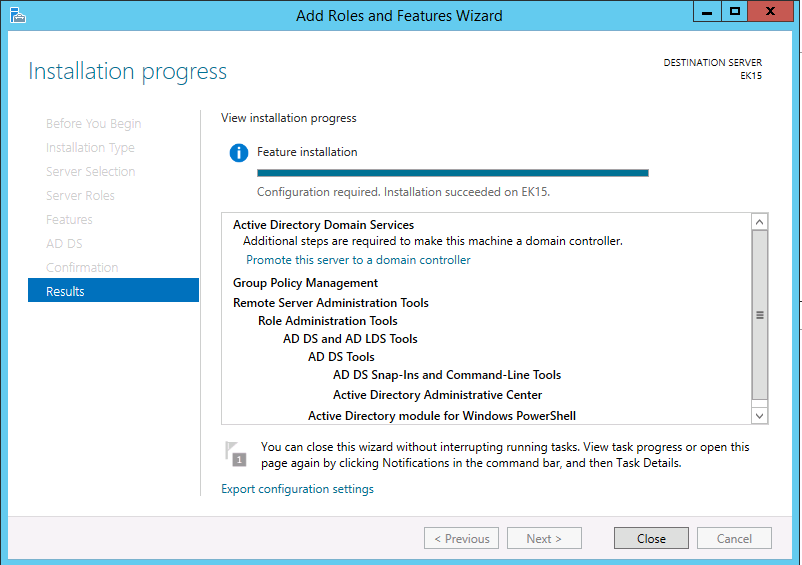
On top the page right side you can see warning message image, click on that we can find drop down box.
It will prompt you to select the option “Promote the Server to Domain Controller” as shown below:

It prompts three option like
1: Add a domain controller to an existing domain.
2: Add a new domain to an existing forest.
3: Add a new Forest.
Need to select based on your requirement. In my scenario I have selected this server to be a New Forest.

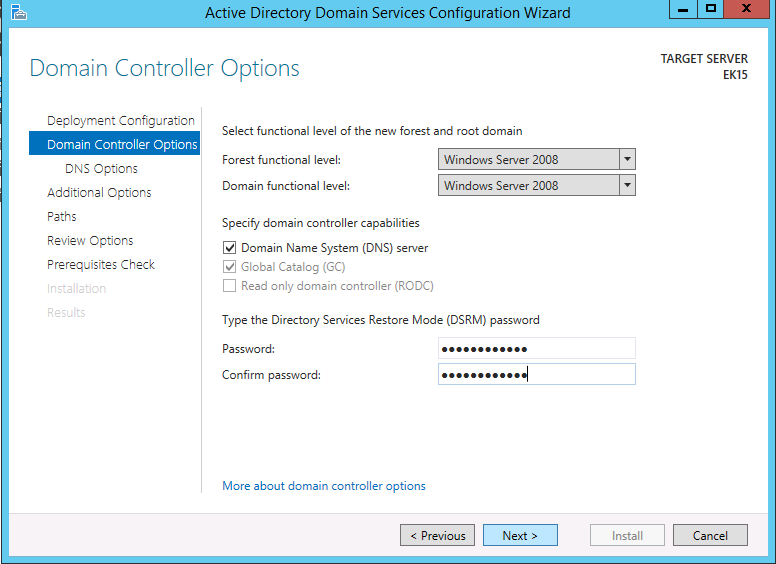
Here we need to select Forest Function level and Domain Function level
By default it will windows server 2008 and later, as my another forest is Window server 2008 r2 so I have selected the below option.
By default the options DNS and GC (Global Catalog) will checked, setting based on your requirement but nothing to worry even you select as it’s not going to harm or effect.
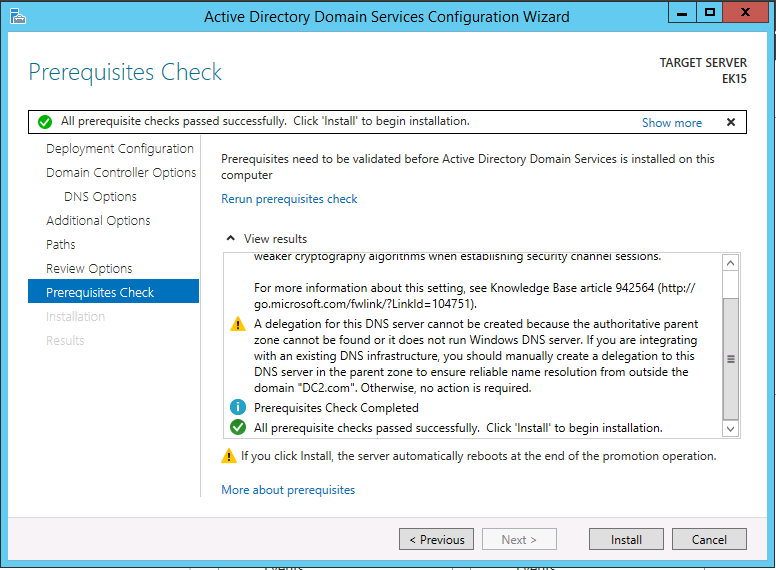
As expected a warning message as we did not configured DNS nothing to worry we can configure later in upcoming blogs.

When you click next it will check or verify the Bios Name.
Verification completed. Click Next and proceed further.

It will take you to review page as shown below:

Click next.
Click Install.
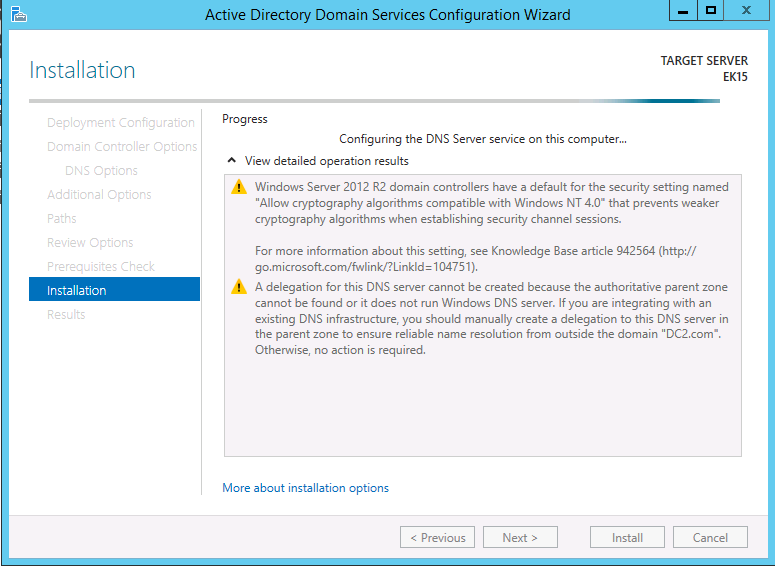
Prompt for warning message not to worry.

Server will reboot automatically.

Great the installation was successful.
Verification to check if all FSMO roles are activated without fail.

By this we can confirm that we can promoted the Windows Server 2012 r2 to Domain controller.
Praveen Kumar
MCSA, MCSE | Windows Server
Publisher @ Techrid.com
