
Step by Step Guide
What is Hyper-V?
Hyper-V in Windows Server 2008 and Windows Server 2008 R2 enables you to create a virtualized server computing environment. You can use a virtualized computing environment to improve the efficiency of your computing resources by utilizing more of your hardware resources.
This is possible because you use Hyper-V to create and manage virtual machines and their resources. Each virtual machine is a virtualized computer system that operates in an isolated execution environment. This allows you to run multiple operating systems simultaneously on one physical computer.
Today Let’s discuss how to create Hyper-v and adding Virtual Hard Disk.
Login to the Server where you want to install Hyper-v
Open Server Manager
Expand Roles -> Add Roles

Wizard will pop out as shown below:

Click Next

Check the box on Hyper-v and click Next.
Click Install.
Adding VHD (virtual Hard Disk)
1: Open Windows Hyper-V Manager
Windows Server 2008 Start > Programs > Administrative Tools > Hyper-V Manager.
2: New Virtual Machine
Click “New > Virtual Machine” in the right side “Actions” panel.

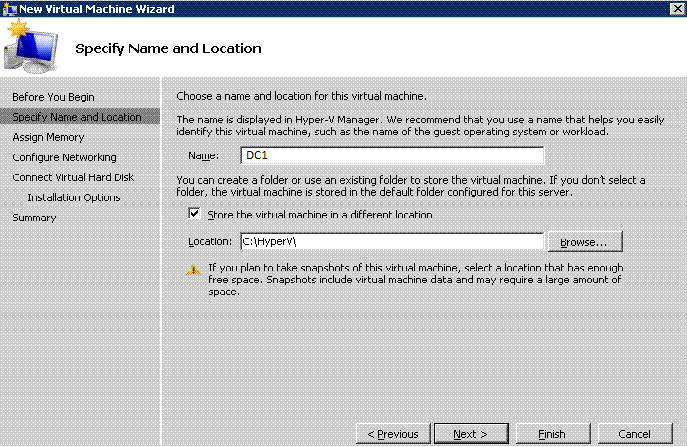
3: Specify Name and Location
4: Assign Memory
Specify the amount of memory to allocate to this virtual machine.
You can specify an amount from 8MB through the maximum physical memory. Then click Next.
It’s my test environment and creating DC I will allocate 1024 mb

5: Configure Networking
Choose the Network
As this will be my Lab Scenario I will select Internal VN from the dropdown list. If it is not in the list, you need to create the virtual network first. Then click Next.

6: Create Virtual Hard Disk
Give the name and location as per your requirement. Specify the hard disk size (25GB) based on your requirement. Then click Next.
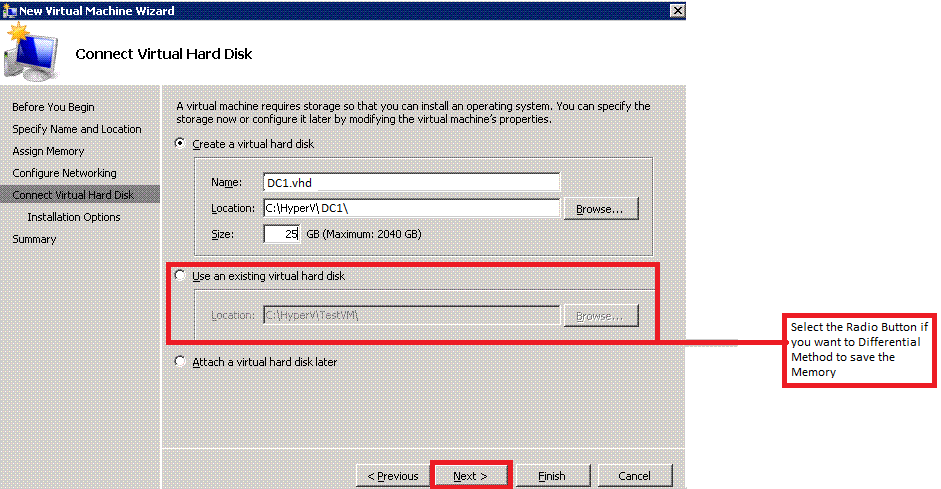
Note: If you want to you use Differential method in order to utilize Parental disk created before then go with Second option as high shown above.
Else Click Next.
7: Install Operating System
Choose the default “Install an operating system later”.

Then click Next.
8: Review and Confirm
Review the configuration information. Click “Finish” button if everything looks ok.

Click Finish.
Now Start and Connect the VHD for further installation of Operating System.
Now Install you Operating System based on your requirement.
For More Info: http://technet.microsoft.com/en-us/library/cc816638(WS.10).aspx
Praveen Kumar
MCTS | Exchange Server
Publisher of Techrid.com
