
Home » Installations (Page 2)
Category Archives: Installations
Installation of Exchange 2010 step-by-step on windows 2008 r2 sp1
Installing Exchange 2010 Server step-by-step on windows 2008 r2 SP1
Before we can install the Exchange 2010 Server roles on the two Windows 2008 R2 servers, we must first make sure the required features and components have been installed.
The following components should be installed on all Exchange 2010 server roles:
- NET-Framework
- RSAT-ADDS
- Web-Server
- Web-Basic-Auth
- Web-Windows-Auth
- Web-Metabase
- Web-Net-Ext
- Web-Lgcy-Mgmt-Console
- WAS-Process-Model
- RSAT-Web-Server
- Web-ISAPI-Ext
- Web-Digest-Auth
- Web-Dyn-Compression
- NET-HTTP-Activation
- RPC-Over-HTTP-Proxy
To install the above features, first open an elevated Windows PowerShell window and type:
On the Start menu, navigate to All Programs > Accessories > Windows PowerShell. Open an elevated Windows PowerShell console (Right Click – Run as administrator), and run the following command as shown below:
Import-Module ServerManager

Note:
All roles in one single box below is the command:
Add-WindowsFeature NET-Framework,RSAT-ADDS,Web-Server,Web-Basic-Auth,Web-Windows-Auth,Web-Metabase,Web-Net-Ext,Web-Lgcy-Mgmt-Console,WAS-Process-Model,RSAT-Web-Server,Web-ISAPI-Ext,Web-Digest-Auth,Web-Dyn-Compression,NET-HTTP-Activation,Web-Asp-Net,Web-Client-Auth,Web-Dir-Browsing,Web-Http-Errors,Web-Http-Logging,Web-Http-Redirect,Web-Http-Tracing,Web-ISAPI-Filter,Web-Request-Monitor,Web-Static-Content,Web-WMI,RPC-Over-HTTP-Proxy -Restart

Post completion it will ask for restart option, reboot your server.
Since we are going to install both the Hub Transport and Mailbox server role on these servers, we must also install the Microsoft Filter Pack.
Now Mount the Media locate and extract the setup files in separate folder rename it, in my Scenario “Folder name:Ex2010”
Before you start the installation there few tasks that we need to complete.
1: Prepare Schema
2: Prepare Active Directory
3: Prepare Domain
Let’s start the above task by opening command prompt as “Run as Administrator.
Note : In case if you have any Legacy versions of Exchange like 2003 or 2007 in your Organization one of command that we need to run in command prompt i.e. otherwise installation will fail.
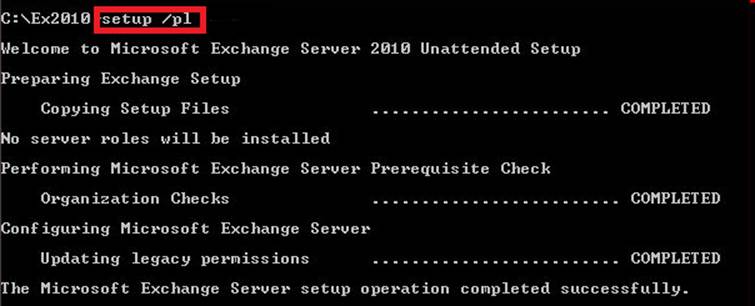
4: PL (Prepare Legacy Exchange Permission)
Let’s begin step towards the installation:
Open the command in Run as Administrator run the command one after the other.
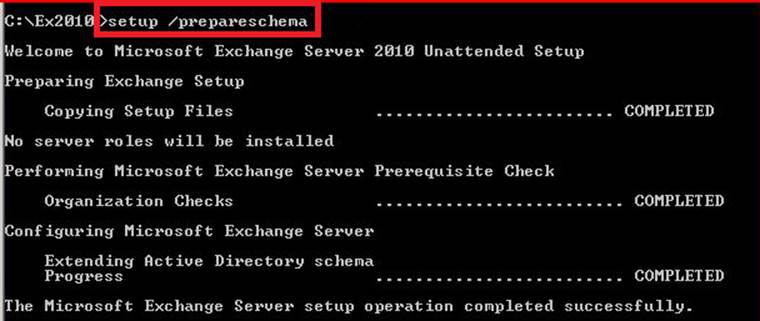
1: Prepare Schema
Command: Setup.com /PrepareSchema
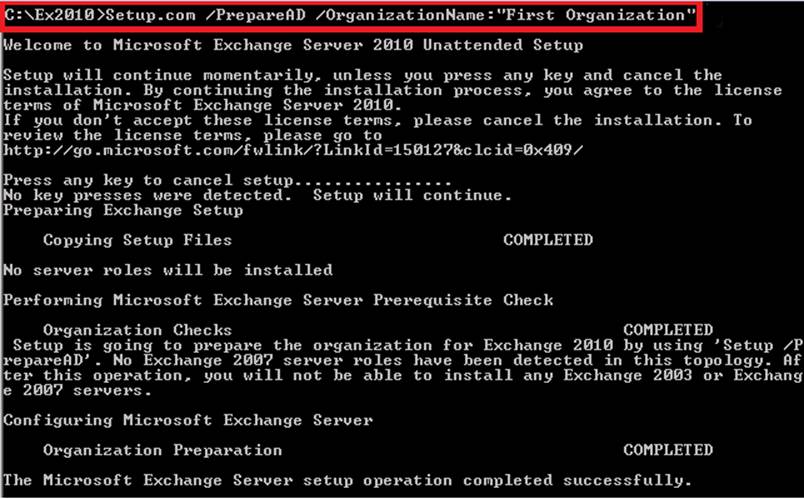
2: Prepare Active Directory
Now if this is your First Exchange Server you need to give your Organization Name like:
Setup.com /preparead /OrganizationName:”First Organization”
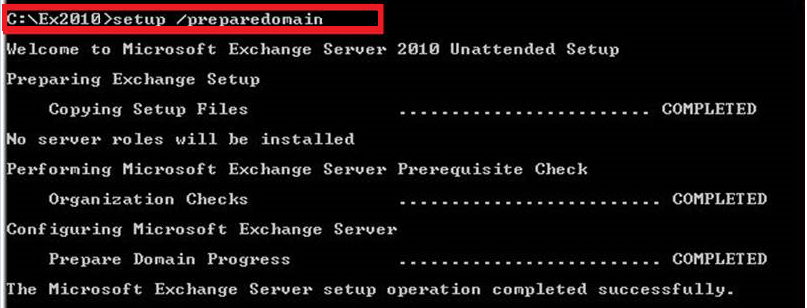
3: Prepare Domain
Command: Setup.com /Preparedomain
Note: If you have multiple domains then command would be
Setup.com /Preparealldomains
In case if you want to run Installation or Upgrade in Unattended mode the command would be:
Mode based on your requirement Install then /M:Install if Upgrade then /M:upgrade
Setup.com /M:Install /R:C,H,M
Let’s Run the Setup in GUI Mode
When the Installation begins we need to select the Language
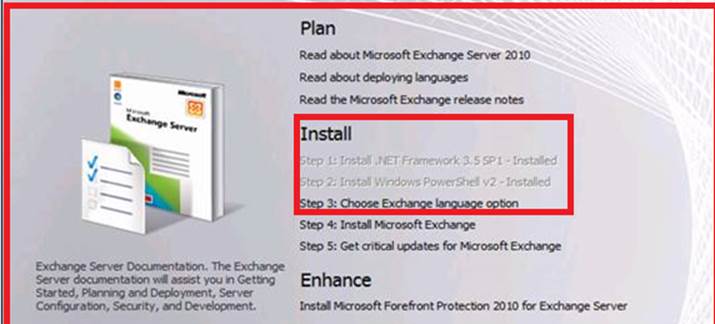
Install Microsoft Exchange

On the “Introduction” page, click Next.
Accept the “License Agreement” and click Next.

Select whether you want to enable “Error Reporting” or not, and then click Next.
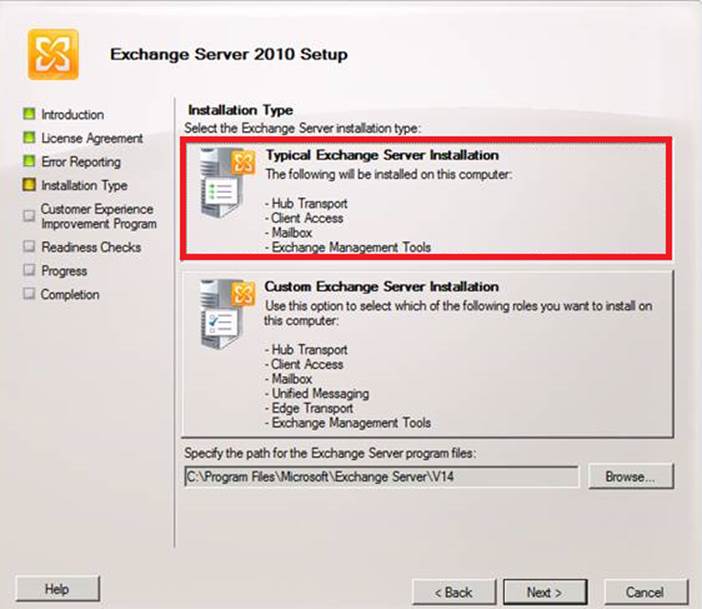
Based your requirement run setup either using Custom or Typical
In my scenario I’m selecting typical then click Next.
Now we will get the option to select External Client Access Server domain
In large organizations, you typically have one Internet-facing Active Directory site and all Client Access servers in this site should usually have this option enabled. In my scenario servers in my lab will be Internet-facing, so we will enable the option and specify the FQDN through which Exchange client services such as Outlook Web App (OWA), Exchange activeSync (EAS), and Outlook Anywhere will be will be accessed.

Then Click Next.
Now choose whether you want to participate in the customer experience improvement program or not, then click Next.
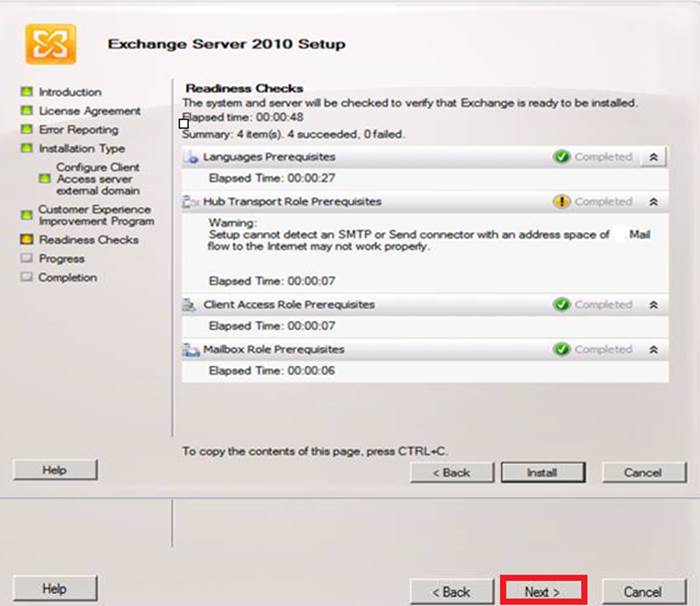
The readiness check will now begin, and hopefully you will not face any errors that will block you from proceeding. When possible, click Install.
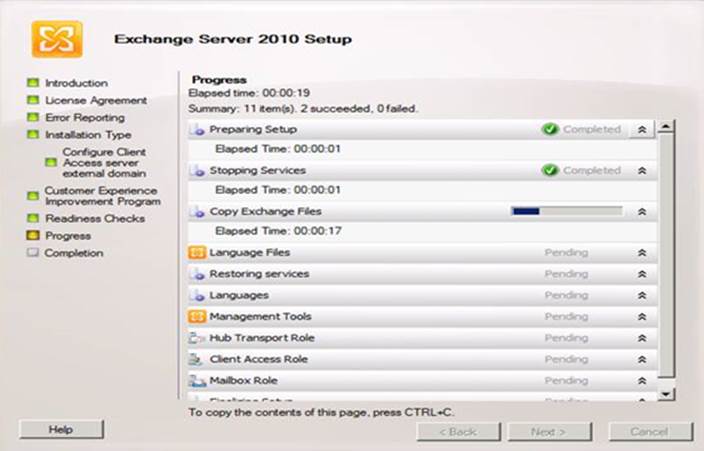
The Exchange server roles are now being installed.
When setup (hopefully) has completed successfully, click Finish.
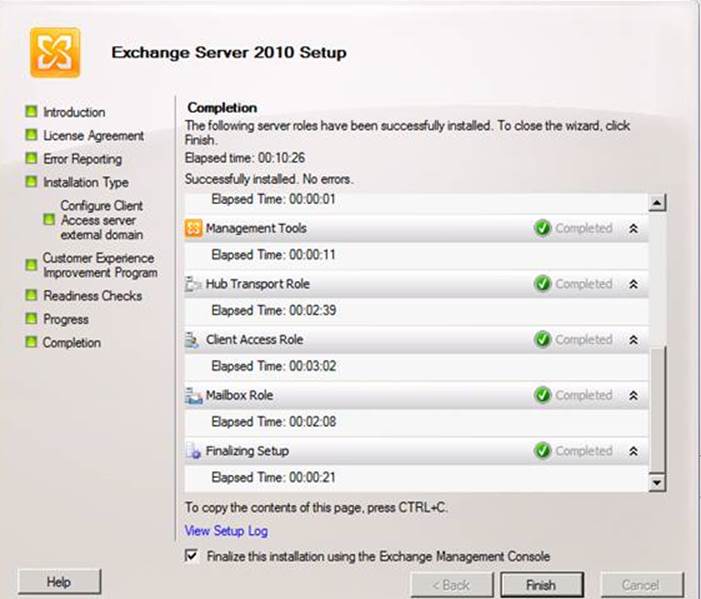
Click Finish
Reboot the Server after reboot completes, click start and open the Exchange Management console.
Note: By default Mailbox database will be will be created.
For More Info:
http://technet.microsoft.com/en-us/library/ff622322(v=exchg.141).aspx
http://technet.microsoft.com/en-us/library/bb125224.aspx
Praveen Kumar
MCTS | Exchange Server
